Dordogne valley cycling: a pre-ride prep checklist
Before the wheels touch Dordogne tarmac, French road law already applies to your bike, your kit, and your bloodstream. A dordogne valley cycling trip checklist is not decorative admin.
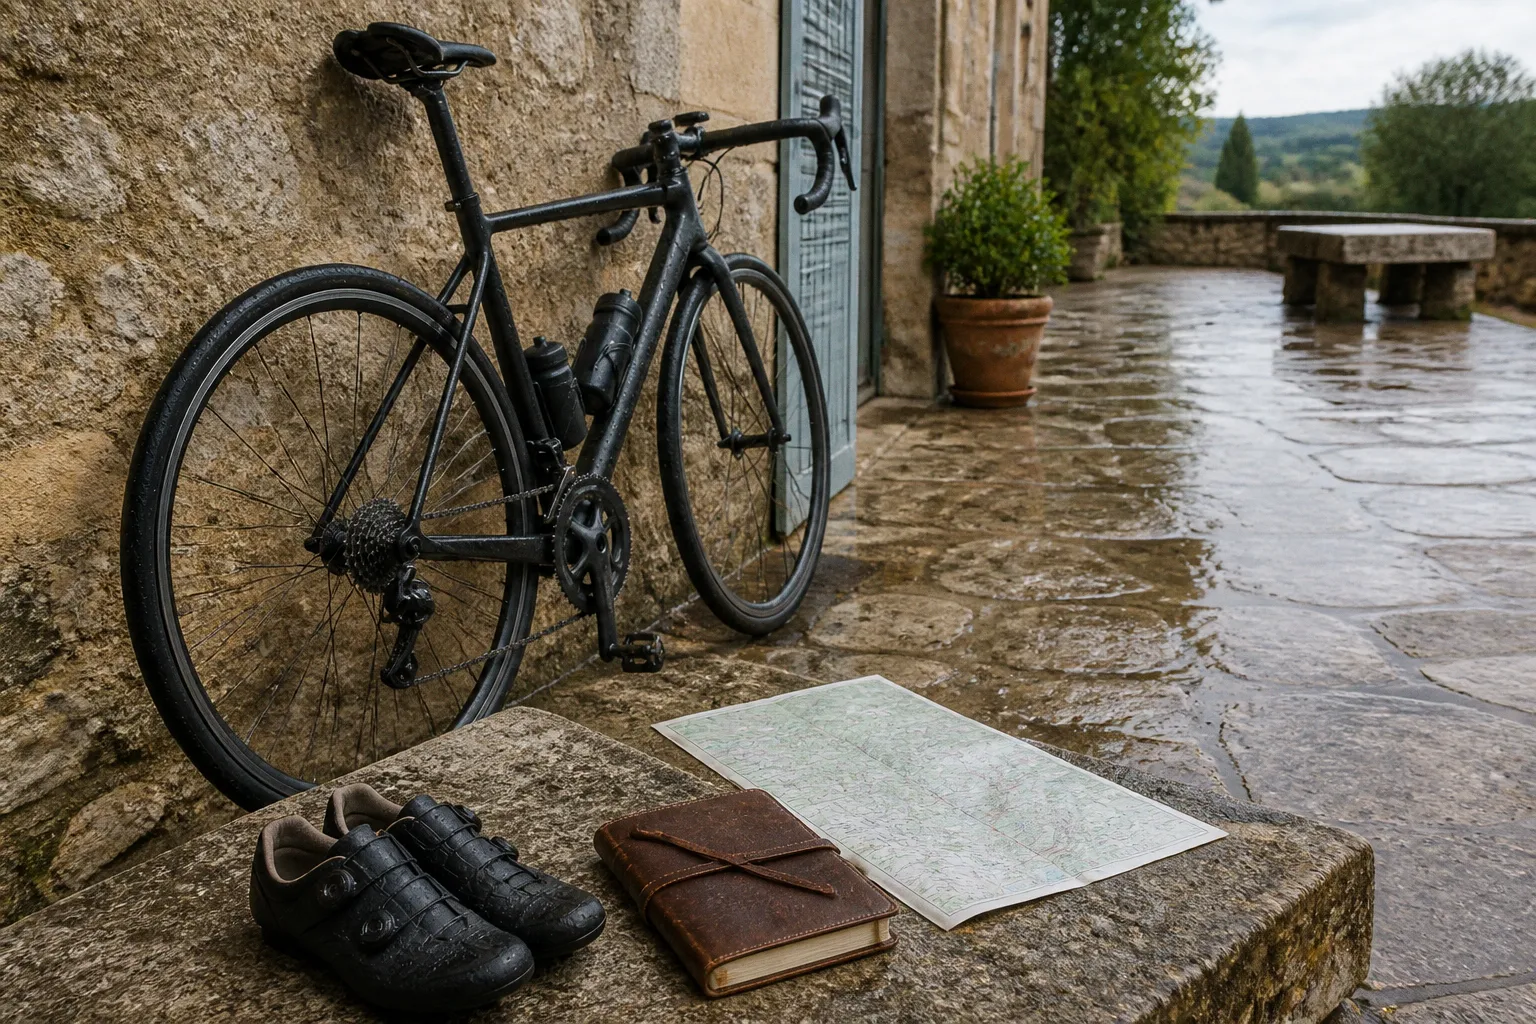
Skip the preparation and a loose axle, dead rear light, missing bell, or badly chosen route can stop the day long before the next café appears. The ride begins in the gîte courtyard, the rental-shop forecourt, or the village square where you unload—not at the first signpost.
The Dordogne is forgiving when the preparation is right and surprisingly uncompromising when it is not. Quiet lanes can turn narrow without warning. A gentle-looking river route can finish with a sharp climb to a bastide. A shaded road may feel cool while the exposed ascent beyond it is already hot. Add French equipment rules, rural traffic, limited services outside the main villages, and the usual rental-bike compromises, and the pre-ride check earns its place.
This is a briefing, not a brochure. The legal equipment, the mechanical inspection, the traffic rules, the route variables, and the visibility requirements all belong in the same dordogne bike ride preparation routine. Read it before you pack the car, again at the gîte, and once more as you load the bikes on the morning of the ride.
Mandatory French Road Safety Regulations for Cyclists
French cycling law is specific about the equipment a bicycle must carry on public roads. A beautifully maintained road bike is still not road-legal if it has no bell, no rear reflector, or no working lights. Rental bikes deserve the same scrutiny as your own: never assume that a quick handover has covered every item required by law.
A roadside equipment check is not interested in how strong your legs are. It starts with the bicycle.
For a bicycle being ridden on a public road in France, check for:
- Two working brakes, operating the front and rear wheels.
- A non-horn audible warning device, such as a bell, that can be heard from a suitable distance.
- A front light showing white or yellow.
- A rear light showing red.
- A white or yellow reflector facing forwards.
- A red reflector facing backwards.
- Orange reflectors on the pedals.
- Orange or amber reflectors visible from the side of the wheels.
The wheel-reflector point is easy to get wrong. The side or wheel reflectors are orange or amber; they are not a front-and-rear colour pair with a red reflector on the back wheel. The red requirement belongs to the rear-facing reflector at the back of the bicycle. Check the physical orientation of the equipment rather than relying on a vague description in a rental listing.
Lights and reflectors do different jobs. A reflector returns light from an approaching vehicle; it does not make the bicycle conspicuous on its own in darkness or poor visibility. Active front and rear lights are therefore part of the practical loadout even when the daytime forecast looks perfect. Test them in the shade, not only under the bright light outside the gîte. A weak battery can look acceptable in the courtyard and fail completely beneath a tree canopy or inside a stone tunnel.
A high-visibility vest is required when cycling at night and, outside built-up areas, in poor visibility. Keep one with every rider rather than treating it as shared luggage in the boot. It needs to be reachable before the light deteriorates or fog settles along the river. A vest in the gîte drawer is not useful on a lane three villages away.
Children under 12 must wear a helmet when cycling, and also when travelling as a passenger on a bicycle. For adults, a helmet is strongly recommended but is not generally compulsory. The legal distinction should not be mistaken for a terrain assessment: narrow lanes, gravel at junctions, shaded descents, and sudden surface changes make a properly fitted helmet sensible for every rider in the group.
Do not rely on a list supplied by the booking platform or on the assumption that a shop has equipped every rental bike in the same way. At collection, look for the bell, squeeze both brake levers, switch on both lights, and inspect the reflectors from the side and rear. If a required item is absent, ask for it before signing off the rental.
Essential Mechanical Inspection and Tool Kit Requirements
The Dordogne valley is not remote wilderness, but a mechanical problem can still become an expensive interruption. Villages and cafés are unevenly distributed, opening hours change outside the main season, and a short-looking loop can put you on the wrong side of a river or ridge when the chain begins to skip. A basic repair kit is not overpacking; it is the difference between a ten-minute roadside fix and a long walk.
For most self-catering cycling holidays, the useful repair loadout is:
- At least one spare inner tube in the correct wheel size, with a patch kit as backup.
- Two tyre levers, preferably plastic.
- A mini-pump, or a CO₂ inflator with enough cartridges for the group’s likely needs.
- A multi-tool with the Allen keys used by the bicycle, plus Torx bits if the bike requires them.
- A chain tool, especially for a longer loop or a group riding several rental bikes.
- A few cable ties and a short strip of strong tape for temporary repairs.
- A small master link if the drivetrain uses a compatible quick-link system.
- A phone, charging cable or power bank, and the rental shop’s contact details.
The last items are not substitutes for mechanical skill. They simply prevent a broken bottle cage, loose mudguard, or damaged bag mount from becoming a reason to abandon the route. If you are hiring electric bikes, add the charger plan to the mechanical plan: confirm the battery range, the charging arrangement at the gîte, and what the rental company expects if the battery or display fails.
The inspection order
Run the inspection before the bikes are loaded into the car, then repeat the quick version before departure. The first check gives you time to solve a problem. The second confirms that transport, storage, or another rider has not altered anything.
1. Brakes: Check pad or shoe condition, rotor alignment, and lever firmness. Pull each lever hard while the bicycle is stationary. The lever should not travel to the handlebar, and the wheel should remain secure when you apply the brake.
2. Tyres: Set pressure according to the tyre and bike manufacturer’s guidance, not by squeezing the sidewall and guessing. Look for embedded flint, cuts, bulges, and worn tread. Dordogne lanes can leave sharp stone fragments exactly where a puncture is least convenient.
3. Wheels and axles: Spin both wheels and watch for side-to-side movement. Check quick-release levers or thru-axles and make sure the wheel is seated correctly in the fork or frame.
4. Chain and drivetrain: Shift through the cassette and chainrings while turning the cranks. Listen for skipping, grinding, or hesitation. A chain that jumps under load is a problem to solve at the rental shop, not halfway up a climb.
5. Contact points: Check the saddle height, seatpost, stem, handlebars, pedals, and bottle cages. Nothing should move when it is loaded by hand. If you do not have a torque wrench, avoid making large adjustments to carbon components and ask the shop for help.
6. Controls and accessories: Confirm that the bell works, lights are mounted securely, bags do not touch the tyres, and cables are not rubbing against moving parts.
A rental bike needs a recorded handover, not just a polite nod. Photograph visible damage before leaving the shop or gîte collection point. Take a short test ride, use every gear, apply both brakes, and stand briefly on the pedals to identify creaks that will be harder to diagnose on the road. A loose rear derailleur or slipping seatpost is not a minor inconvenience when the route has a long descent ahead.
For riders travelling with their own bikes, transport creates its own inspection stage. Remove anything that can swing into the spokes, check the derailleur after unloading, and verify that the handlebars and wheels are aligned. If the bike has been carried on an external rack, inspect it for dust, rain, and movement before assuming it is ready.
Navigating Local Traffic Laws and Alcohol Limits
A bicycle on a French public road is a vehicle, not a pedestrian. Ride on the right, obey signs and signals, stop at red lights and stop signs, and signal clearly before changing direction. A cycle route sign does not cancel an instruction from a road sign. Nor does a quiet lane mean that priority can be guessed from the absence of traffic.
The rural Dordogne adds a narrower margin. Stone walls, hedges, parked cars, farm entrances, blind bends, and agricultural machinery all reduce the space available for a clean manoeuvre. A road that looks empty from the crest can carry a van, tractor, or delivery vehicle around the next bend.
Riding in a group
Two riders may ride two abreast where the conditions allow, but the group should move into single file when traffic approaches from behind or ahead, on narrow roads, near bends, and anywhere an overtaking driver would have limited room. Do not turn a quiet lane into a moving blockade. Leave enough space between riders for a vehicle to assess the group and pass safely rather than forcing a driver into an uncertain manoeuvre.
Agree on simple calls before leaving the gîte: obstruction, car behind, car ahead, slowing, and stopping. The call should travel through the group without panic. On a descent, leave room for the rider ahead to brake without creating a chain reaction.
Roundabouts require a deliberate approach. Read the lane markings, signal your intended exit, and make your position visible rather than hugging the kerb so tightly that a driver misjudges the space. Watch for trailers and larger vehicles, whose mirrors and turning paths can take more room than a passenger car. If the roundabout feels beyond the group’s confidence, dismount and use the pedestrian arrangements where permitted; losing a minute is preferable to improvising in the circulating lane.
The same caution applies at junctions on the approaches to villages and market towns. Sight lines may be blocked by stone buildings, vegetation, or parked vehicles. Slow before the junction, not after entering it. A navigation app can tell you where to turn; it cannot tell you whether a bend is hiding a fast-moving vehicle.
Alcohol and the return ride
France applies drink-driving rules to people using bicycles on public roads. The safest interpretation for a cycling holiday is uncomplicated: if you are riding back to the gîte, do not drink beforehand. A Bergerac tasting, a long lunch, or an evening aperitif belongs after the final ride, not in the middle of it.
The legal limit is not a practical drinking allowance. Alcohol affects balance, reaction time, judgement, and the ability to read a descent before a rider feels obviously impaired. Heat, dehydration, an empty stomach, and accumulated fatigue make the calculation even less reliable. Plan the day so that the bicycle is parked before the wine begins, and arrange a taxi, lift, or alternative transport if the group changes its mind at lunch.
The same rule applies to e-bikes. Electric assistance does not turn a bicycle into a passenger vehicle with a different margin for error, and it does not make an impaired rider safer. Assistance can make speed easier to carry into a bend, particularly on a heavier bike.
Optimizing Your Route: Seasonal Timing and Terrain
Route planning in the Dordogne is less about finding the longest ride than matching the route to the group. A map line that looks modest can include a sustained climb from the river, a rough connector between villages, or a return leg exposed to the afternoon sun. Check the elevation profile, surface type, road classification, and likely stopping points before you commit.
The broad seasonal pattern is useful:
| Period | Typical riding considerations | Planning response |
|---|---|---|
| March–April | Cooler conditions, possible rain, quieter roads, and some limited midweek services | Choose flexible loops and confirm cafés or shops before setting out |
| May–June | Longer daylight, warmer days, and generally comfortable riding conditions | A strong all-round period; reserve popular gîtes and weekend stops early |
| July–August | Heat, busy attractions, crowded village centres, and exposed climbs at midday | Start early, carry more water, and avoid making the hardest ascent the centre of the afternoon |
| September–early October | Cooler air, quieter roads, and useful daylight | Often the best compromise between conditions, services, and crowd levels |
| Late October–November | Shorter days, cooler temperatures, and a greater chance of rain | Plan shorter loops, check opening hours, and return before the light fades |
These are planning tendencies, not guarantees. A hot spring afternoon can be harder than a cool day in September, and a summer storm can alter a route in an hour. Check the forecast for the valley and the higher ground separately where possible. Wind and cloud can change the feel of a route even when the temperature looks reasonable.
Choosing the shape of the ride
For a flatter, family-friendly day, the former railway line between Cazoulès, south of Souillac, and Sarlat-la-Canéda is a practical option. It offers a gentler profile and avoids much of the traffic stress associated with a road loop. It is particularly suitable for mixed-ability groups, trailers, and riders who want a destination lunch without turning the day into a climbing exercise.
The wider valley is different. Many attractive loops involve repeated rises away from the river, even when the route is described casually as rolling. The roads towards Domme and Beynac can deliver short, sharp climbs and dramatic views. Routes on the left bank towards Saint-Cyprien may offer longer, steadier gradients, but they still require a realistic estimate of the group’s climbing ability. Do not select a route by distance alone.
Before leaving, identify:
- The first substantial climb and whether it arrives before the group is warmed up.
- Reliable water points, shops, and cafés rather than hoping every village will have an open service.
- A bail-out point where a tired rider can shorten the loop.
- River crossings and bridges, especially if a return route depends on one crossing.
- Sections where the surface changes from smooth tarmac to gravel, broken lane, or compacted track.
- Mobile reception gaps and the location of the nearest larger settlement.
- A meeting point in case the group becomes separated.
Water planning should follow the route, weather, and rider rather than a universal formula. Carry enough for the longest gap between dependable refill points, with additional capacity for hot weather and climbing. A bottle emptied before the hardest ascent is a route-planning error, not bad luck. On warm days, begin drinking early and use shaded stops before the group reaches the point of exhaustion.
Navigation deserves a physical backup. Download the route before leaving the gîte, carry a paper map or a clearly marked alternative, and do not let a phone battery become the single point of failure. A navigation app may direct a road cyclist onto a surface suitable only for a mountain bike or send the group through a steep village lane because it is technically the shortest connection. Read the route in advance and question any abrupt change in surface or elevation.
In the Dordogne, the elevation profile tells the truth that the distance figure leaves out.
Visibility and Lighting Standards for Rural Roads
Daylight riding in high summer is not the whole visibility problem. Tree cover can darken a lane well before sunset. River gorges hold shadow. Fog can settle along low ground in the morning. A stone tunnel or covered passage can require lights even when the road outside is bright.
The practical rule is to make the bicycle visible before visibility becomes a debate. Use a working white or yellow front light and a red rear light in darkness, and use them whenever conditions make the bicycle harder to see. Check that the lights are aimed to be seen without dazzling other road users. A lamp buried beneath a handlebar bag or pointed at the front tyre is technically present but practically wasted.
The high-visibility vest requirement applies at night and, outside built-up areas, in poor visibility. There is no need to invent a distance cutoff or a precise visibility test that the rule does not state. If fog, heavy rain, fading light, or deep shade makes the rider harder to detect, the vest belongs on the rider, not in the luggage. Put it on before entering the affected section.
Reflectors remain useful as a passive layer:
- The front-facing reflector should be white or yellow.
- The rear-facing reflector should be red.
- Pedal reflectors should be orange.
- Wheel or side reflectors should be orange or amber.
They do not replace lights. A driver needs to see a moving bicycle before the vehicle’s headlights reach the reflector at a useful angle, and a rider needs to be identifiable from more than one direction. The combination of active lights, correct reflectors, and a high-visibility vest is more robust than relying on any single item.
Treat tunnels, covered sections, and heavily shaded lanes as visibility hazards. Switch on the lights before entering, move into single file, and keep the group moving unless there is a safe place to stop. Do not halt in the centre of a lane for a photograph. If a rider needs to adjust a light or layer, exit the tunnel or pull completely clear of the carriageway first.
Dusk is particularly easy to misjudge. The valley may still look bright from an open terrace while the road between villages is already difficult for a driver to read. Set a return time that leaves a margin for delays, punctures, and the final climb. If the route is likely to finish after dark, start with the lights charged and the vest accessible rather than hoping the weather and timing will cooperate.
Pre-Roll: The Final Sweep
The Dordogne rewards riders who arrive prepared. Sort the kit, sort the law, sort the route—the valley does the rest.
The final check should be quick enough to use every morning and specific enough to catch the faults that matter:
- Brakes: both operate firmly, with no lever pulling to the bar and no obvious pad or rotor problem.
- Tyres: pressure set, sidewalls inspected, and no embedded stone, cut, or bulge.
- Wheels: secure in the frame and fork, with no alarming wobble or rubbing.
- Chain and gears: shifting across the usable range without skipping, grinding, or dropping the chain.
- Lights: front white or yellow and rear red, both working with charged batteries.
- Reflectors: front white or yellow, rear red, orange pedal reflectors, and orange or amber wheel reflectors present and visible.
- Bell: working and reachable without taking both hands from the controls.
- Helmet: correctly fitted for every rider who chooses to wear one and compulsory for children under 12.
- Repair kit: tube, levers, pump or CO₂, multi-tool, and patching equipment packed where it can be reached.
- Water and food: enough for the longest unsupported section, with an allowance for heat and climbing.
- Route: elevation checked, surface confirmed, waypoints downloaded, and a shorter option understood.
- Visibility gear: high-visibility vest accessible for night riding or poor visibility outside built-up areas.
- Contact details: rental shop, accommodation, and emergency information available even if the phone signal disappears.
The first kilometre is a useful final test. Brake gently, change through the gears, listen for rattles, and check that bags, bottles, and lights stay secure. If the bike feels wrong in the village, it will not improve on the climb out of it.
The best Dordogne cycling route is not necessarily the one with the most kilometres or the highest viewpoint. It is the route that leaves enough capacity for the return, respects the road, and keeps the group together. Get the legal equipment right, give the bicycle a proper inspection, plan around the terrain and the light, and the valley becomes what it should be: a sequence of quiet lanes, river crossings, villages, and climbs that feel earned rather than improvised.