Reclaimed terracotta tiles: a restoration roadmap
Reclaimed French terracotta tiles are not difficult because they are old. They are difficult because their surface history is usually unknown.
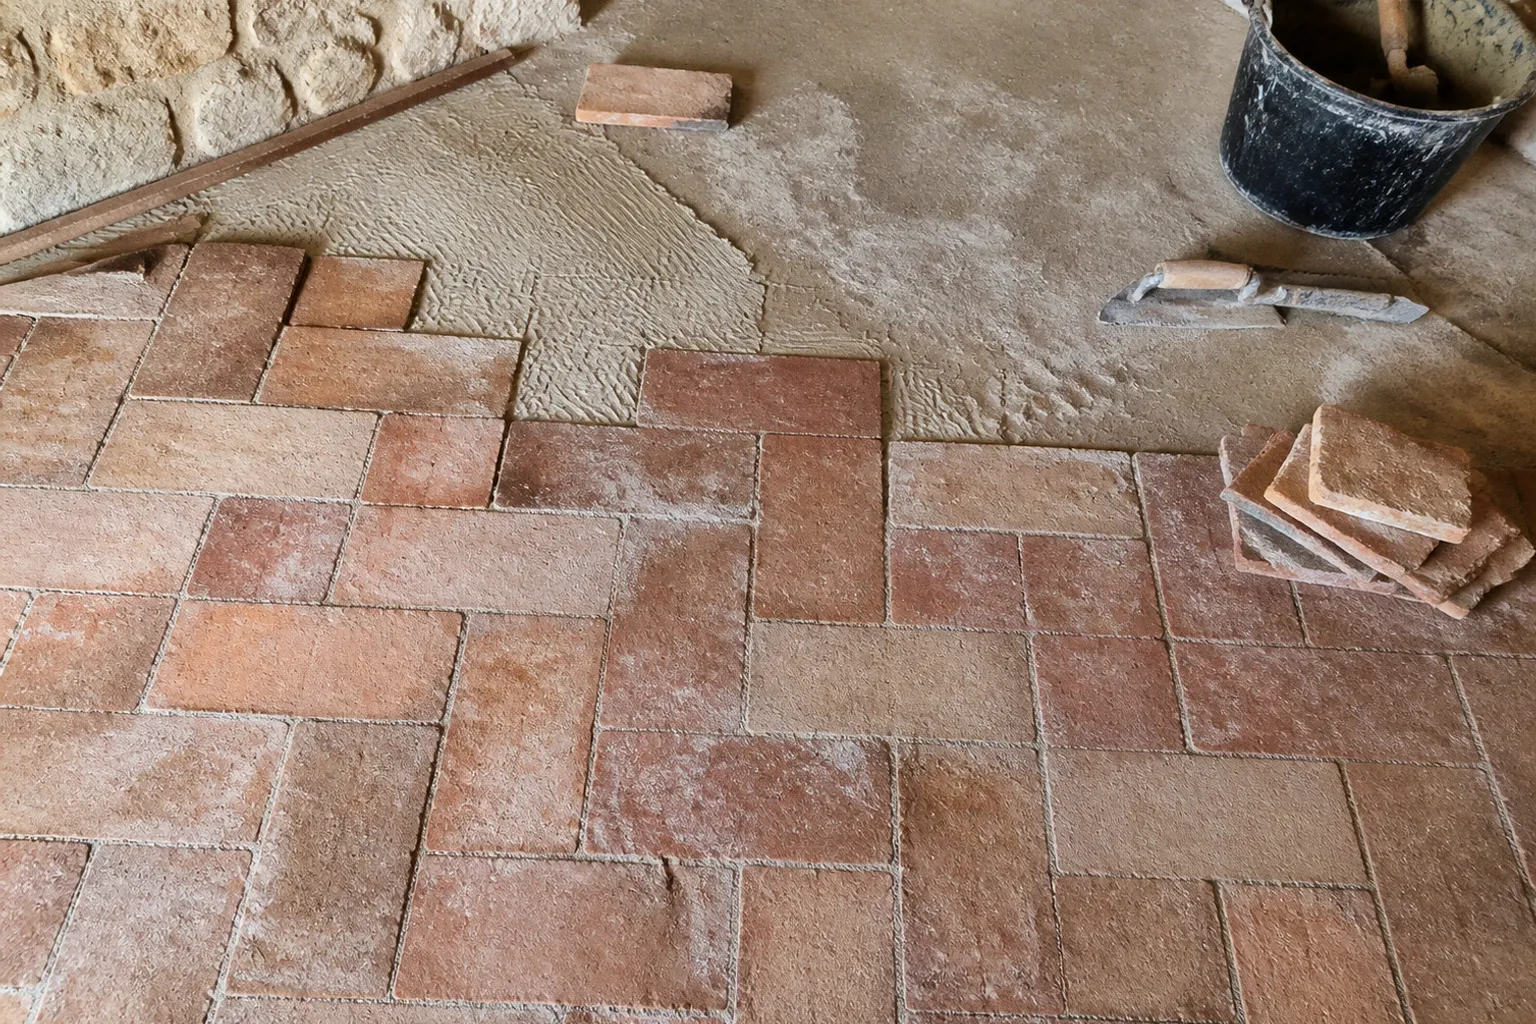
A reclaimed floor may carry several generations of wax, acrylic polish, ingrained dirt, cooking residue, salts, and local repairs. The fired clay beneath remains porous. That combination creates the central restoration problem: the tile must be cleaned deeply enough to remove the accumulated surface film, but not treated so aggressively that its face is eroded or its moisture movement is obstructed.
This is the practical issue behind successful reclaimed French terracotta tiles restoration. The objective is not to make old tomettes look new. It is to return the floor to a stable, breathable condition in which its colour, thermal mass, and wear pattern remain legible.
Reclaimed terracotta is a porous building material, not a decorative ceramic surface. Treating it like glazed tile is the fastest route to a damaged floor.
The anatomy of antique tomettes: fired clay, porosity and wear
Traditional French terracotta tiles are made from fired clay. In France they are commonly called tomettes, while the term terracotta derives from the Italian expression for cooked earth. The distinction is linguistic rather than structural. These are absorbent, unglazed clay units whose performance depends heavily on porosity.
That porosity is the useful characteristic and the operational liability.
A reclaimed tile can absorb moisture from cleaning solutions, rising damp, spilled liquids, or an inadequately dried screed. It can also retain wax and synthetic products below the visible surface. A floor that appears merely dull may therefore have a considerable amount of material lodged in its pore structure.
The visual inspection should begin before any detergent is applied. Surface colour is not a sufficient diagnostic. A dark, glossy area may indicate wax rather than naturally dense clay. Pale edges may indicate abrasion, efflorescence, or simple exposure to footfall. A patch with a different tone may be a replacement tile, a later sealer, or a section that has dried at a different rate.
For a restoration contractor, the relevant questions are physical:
- Does the tile absorb a small quantity of clean water at a similar rate to adjacent tiles?
- Is the surface matte, waxed, acrylic-coated, or irregularly polished?
- Are there powdery deposits at joints or edges?
- Are corners broken because of handling, footfall, or substrate movement?
- Does the floor sit on a stable load-bearing base, or is the tile moving under pressure?
- Is the colour variation a feature of the reclaimed batch, or evidence of contamination?
- Is underfloor heating installed below the floor?
The last point is not a minor services check. Underfloor heating changes the cleaning protocol, the drying rate, and the risk of uneven treatment. The system must be turned off at least 48 hours before cleaning or restoration begins. If it remains active, water and cleaning solutions evaporate too quickly from the upper surface, while deeper moisture may remain trapped below. That produces inconsistent results and makes it difficult to judge whether the clay is actually dry.
Dimensional irregularity is part of the material
Old French floor tiles are rarely uniform in the way modern factory-produced tiles are. Their thickness, edge profile, colour and degree of firing can vary across one batch. This affects both laying and cleaning.
A thin tile beside a thicker one will respond differently to moisture. A heavily worn face may absorb sealer faster than an intact tile. A replacement unit from a different source may remain visibly distinct even after treatment. None of these conditions automatically justifies replacement.
The correct standard is not visual uniformity at close range. It is structural stability, coherent moisture behaviour and a surface that can withstand the intended footfall. In a gîte, this distinction matters. A domestic room may tolerate a fragile finish that would fail under repeated arrivals, luggage, dining chairs and wet footwear. The restoration specification must be written for actual occupancy rather than for a staged photograph.
Deep stripping: removing decades of wax and synthetic build-up
Cleaning antique tomettes is primarily a removal operation. The floor cannot be sealed properly while old waxes, acrylic polishes or compacted dirt remain across the surface.
This is where many otherwise competent renovations fail. A new sealer is applied over an unstable film. The result may look improved for a short period, but the finish becomes patchy as the old material softens, darkens or releases under footfall. The new product has not bonded to clean fired clay. It has bonded to an uncertain layer of previous maintenance products.
Start with a controlled test area
A test area should be representative of the floor, not hidden in the least visible corner. Select a section containing the typical colour, wear and surface contamination. The test should establish four things:
1. Whether the existing finish is wax, acrylic, dirt, or a combination of these.
2. How quickly the tile responds to the chosen alkaline cleaner.
3. Whether the face changes colour during washing.
4. How much drying time the tile requires before the next operation.
Acid-based cleaners should not be treated as a default solution for reclaimed terracotta. Their suitability depends on the tile and the contamination, and surface erosion or discolouration is possible. A method that is acceptable for some mineral deposits on modern ceramic surfaces may be destructive on porous fired clay.
Alkaline intensive cleaners are commonly used to break down old wax and surface build-up. Concentrated products may require dilution in the range of 1:1 to 1:3, depending on the severity of the grime. That is a working range, not permission to treat every floor at maximum strength. The test area determines whether the selected dilution is removing contamination or attacking the material unnecessarily.
The solution should be left to dwell for approximately 10 to 15 minutes before scrubbing and rinsing. The dwell time gives the cleaner an opportunity to soften the old film. Immediate scrubbing often creates more labour without improving penetration. Excessive dwell time, however, should not be assumed to be better. The floor must be observed, and the product instructions must govern the final procedure.
Mechanical action should follow the material, not overpower it
The objective is to suspend and remove the softened residue. It is not to grind the tile into a uniform colour.
Aggressive abrasion can reduce the face of worn tiles, expose softer inclusions and exaggerate differences between adjacent units. It can also round already damaged edges. On a floor with historical variation, over-cleaning usually produces a less authentic surface with no corresponding performance benefit.
Use a measured progression:
- Apply the chosen cleaner to a manageable section.
- Allow the stated dwell period, normally around 10 to 15 minutes for alkaline stripping.
- Agitate with a suitable brush or controlled mechanical method.
- Extract the dirty solution rather than allowing it to dry back onto the floor.
- Rinse thoroughly with clean water.
- Inspect the surface only after the residue has been removed and the area has begun to dry.
The rinse stage is not cosmetic. Residual alkalinity can interfere with later sealing and may contribute to uneven colour or salt movement. On a sloping or irregular floor, dirty rinse water can migrate into lower sections and produce a second contamination line. Work in controlled areas and remove the liquid rather than distributing it.
A floor may need more than one stripping cycle. That is not evidence of a poor product. Wax layers often have been accumulated over years, and the visible finish may represent several maintenance systems. The correct stopping point is clean, stable clay with no active surface film—not an artificially bright colour.
Do not confuse patina with contamination
Patina is a record of use. Contamination is an unstable layer that changes the behaviour of the floor.
A darkened centre path may be the result of footfall and wear. It may also contain wax and embedded soil. The distinction becomes clearer during the test process. Stable colour remains reasonably consistent as the surface dries. A contaminated area often changes markedly as old product is softened and removed.
The auditor’s preference is conservative. Retain variations that are integral to the fired clay. Remove materials that sit on top of it, migrate through it, or interfere with adhesion and breathability.
The critical drying phase and underfloor heating protocols
Drying is the least glamorous stage and the most frequently shortened. That is a practical error.
Terracotta can appear dry at the surface while retaining moisture within its pore structure or beneath the tile. Applying sealer at this point can trap that moisture. The visible consequences may include cloudy patches, uneven colour, efflorescence or a finish that fails to cure consistently.
The floor should be allowed to dry naturally after stripping and rinsing. Ventilation is useful, but forced heat must be controlled. Rapid surface evaporation does not prove that the full assembly is dry. In a thick reclaimed floor, the thermal mass of the clay and substrate can delay moisture release.
Underfloor heating must remain off for at least 48 hours before cleaning begins. It should not be used as a shortcut to accelerate the process immediately after washing. Heat can drive moisture toward cooler sections, increase evaporation at the surface and create uneven drying between tiles of different thicknesses.
A practical assessment considers:
| Condition | What it indicates | Restoration implication |
|---|---|---|
| Surface remains dark in isolated patches | Moisture or retained contamination | Continue drying and investigate before sealing |
| White or powdery deposits appear near joints | Possible salt movement or residue | Do not seal over the deposit; establish the cause |
| Water absorption varies sharply between adjacent tiles | Mixed porosity, contamination or different tile batches | Expect uneven sealer uptake and plan for additional coats |
| Gloss remains after washing | Residual wax or synthetic coating | Repeat controlled stripping rather than applying sealer |
| Tile faces lighten as they dry | Moisture-related colour change | Wait for stable colour before assessing the finish |
| Cracks move under footfall | Substrate or bedding problem | Repair the base before cosmetic restoration |
The aim is not to impose an arbitrary drying schedule. It is to reach a stable condition. The duration will depend on tile porosity, floor thickness, ventilation, ambient humidity, the amount of wash water used, and the condition of the substrate.
A sealer is not a drying solution. It is the final surface decision made after the moisture problem has already been resolved.
Modern sealing techniques for breathable terracotta floors
Sealing old French floor tiles requires a distinction between protection and encapsulation.
A breathable, penetrating sealer enters the pore structure and provides resistance to moisture and staining without creating an impermeable plastic film across the surface. That is generally more compatible with reclaimed terracotta than a heavy synthetic coating that locks the floor beneath a visible layer.
The exact product specification depends on the manufacturer and the condition of the tile. The broad technical requirement is consistent: the sealer should preserve breathability, reduce moisture ingress and avoid creating a finish that discolours as the floor moves through normal humidity changes.
Sealer consumption is governed by porosity
A dense, well-fired tile may accept relatively little product. A soft, highly absorbent reclaimed tile may require repeated coats. In a complete restoration, some French terracotta floors can require as many as six to eight coats of sealer.
That figure should not be interpreted as a universal specification. It describes the upper end of what an absorbent floor may need. Applying eight coats to a comparatively dense tile can leave excess product on the surface. Applying one coat to an open, porous tile may leave it inadequately protected.
The correct sequence is incremental:
1. Confirm that stripping residue has been removed and the floor is dry.
2. Apply a thin, even coat of the selected breathable sealer.
3. Allow the product to penetrate and cure according to its instructions.
4. Inspect for dry patches, pooling, gloss variation and unabsorbed material.
5. Repeat only where the tile remains absorbent or insufficiently protected.
6. Keep the finish consistent across the full visual field rather than creating isolated high-gloss patches.
The desired appearance is usually a low-sheen or natural finish. A glossy surface can indicate excess material rather than superior protection. It also highlights footfall and makes uneven application obvious.
Sealing is not a substitute for correct laying
The process of laying reclaimed terracotta floor tiles must be considered before the final sealing stage. A tile can be perfectly restored at the surface and still fail because the bedding is uneven, the substrate is moving, or moisture is rising from below.
The load-bearing capacity of the floor, the condition of the screed and the distribution of tile thickness all affect performance. Thick and thin units may require careful adjustment during laying. Joints should accommodate the irregular geometry rather than forcing every tile into a modern, mechanically consistent grid.
For a countryside property, the floor may connect kitchens, entrance halls, dining areas and external thresholds. These zones have different moisture and footfall profiles. A front door with wet shoes will test the sealer differently from a low-traffic bedroom. A kitchen will expose staining and cleaning resistance. A pool-adjacent route will introduce repeated wet contact.
This is where proximity metrics become relevant. The floor’s performance should be assessed in relation to:
- External doors and sources of rainwater.
- Kitchens, utility spaces and food spill risk.
- Pool terraces or changing areas.
- Bathrooms and rooms with frequent wet cleaning.
- Furniture with concentrated footfall or point loads.
- Areas where luggage wheels repeatedly cross the surface.
A single finish specification may still be appropriate, but the maintenance burden will not be evenly distributed. The highest-risk zones should not determine an unnecessarily impermeable treatment for the whole building.
Maintenance should preserve the sealer, not rebuild it
Once the floor has been restored, maintenance should be restrained. Strong repeated stripping will remove more material than necessary. Heavy wax application can recreate the original problem by adding a new unstable layer.
Routine cleaning should use a method compatible with the selected sealer and should avoid leaving standing water. Spills should be removed before they migrate into the porous clay. Furniture should not be dragged across irregular tile edges. In a gîte, clear instructions for cleaners are more valuable than an elaborate product schedule that nobody follows.
The operational test is simple: can the floor be maintained by the property team without repeated specialist intervention? If not, the sealing system may be poorly matched to the building’s occupancy.
Avoiding historical pitfalls: why raw linseed oil fails
Traditional restoration accounts often refer to boiled linseed oil. Historically, terracotta floors were saturated with it as a sealing treatment. That does not make every oil-based method suitable for present-day restoration.
Raw linseed oil should be avoided because it attracts mould. That failure is especially serious in rural properties where ventilation, seasonal humidity and intermittent occupation can vary considerably. An oil that appears satisfactory during a dry installation period may create a biological and odour problem when the building is closed, humid or poorly ventilated.
This is also a case where historical authenticity is often misunderstood. A restoration does not become more correct merely because it uses an older material. The relevant question is whether the treatment is compatible with the current floor, current climate, current cleaning regime and current occupancy.
Modern water-based or impregnating sealers can provide a more controlled approach while preserving the porous character of the terracotta. They should still be selected and applied with restraint. Water-based does not mean risk-free. An unsuitable product can still create colour change, poor penetration or a surface film.
Sourcing antique French tiles: consistency is more useful than age
When sourcing antique French tiles, age is not the only useful specification. Batch consistency, porosity and thickness may be more important than an attractive provenance claim.
A supplier should be able to describe the tiles’ condition without relying on vague terms such as reclaimed, antique or authentic. The practical questions concern physical stock:
- Are the tiles from one dismantled floor or mixed from several sources?
- Are thicknesses reasonably compatible?
- Have they been cleaned, waxed or sealed already?
- Are the backs carrying old mortar or adhesive?
- Are there broken edges that will affect laying?
- Has the batch been stored dry?
- Can replacement pieces be obtained if breakage occurs during installation?
Mixed batches can be perfectly usable, particularly where the design calls for a varied provincial interior. They are less suitable where the client expects a controlled, uniform field. A sample board should contain several tiles, not one carefully selected piece. The sample must show colour range, edge wear, pitting, thickness and absorption.
For a luxury self-catering property, the procurement decision should also account for future repair. A floor installed with a rare, unrepeatable mix may look resolved at handover but become difficult to patch after years of use. The building owner should retain spare tiles from the same batch. That is basic asset management, not unnecessary caution.
A restoration sequence that survives practical use
The most reliable roadmap is procedural rather than decorative.
1. Survey the existing floor
Record tile movement, cracks, damp indicators, old coatings, thickness variation and the relationship to doors, kitchens, bathrooms and heating systems. Photograph representative areas before work begins. Mark fragile tiles and sections with different construction.
2. Establish the substrate condition
A clean tile over a failing base is still a failing floor. Resolve movement, loose bedding and moisture transmission before surface restoration. Do not use sealer to disguise structural instability.
3. Isolate and test
Select a representative test zone. Confirm the cleaning method, dilution, dwell period and mechanical action. Monitor the tile face as it changes from contaminated to clean.
4. Strip the floor in controlled sections
Use an alkaline intensive cleaner where appropriate, allowing approximately 10 to 15 minutes of dwell time before agitation. Extract dirty liquid and rinse thoroughly. Repeat only where surface films remain.
5. Dry without forced thermal shortcuts
Keep underfloor heating off for at least 48 hours before cleaning. After washing, allow the floor to dry fully and evenly. Do not judge the final colour or apply sealer while dark moisture patches remain.
6. Apply a breathable penetrating sealer
Build protection gradually. Highly absorbent tiles may require multiple coats, in some cases six to eight. Avoid pooling and stop when the tile no longer accepts the product in a useful way.
7. Commission the floor for its real occupancy
Assess entrance routes, wet areas, dining zones and furniture placement. Provide a cleaning method that will not reintroduce wax build-up or leave standing water. Keep spare tiles and a record of the sealer used.
The sequence is deliberately conservative. Reclaimed terracotta rewards patience and punishes attempts to compress the programme. The clay itself is not the expensive part of the mistake. The expensive part is discovering that moisture, wax or an incompatible coating has been trapped across an entire finished floor.
The final assessment
Reclaimed French terracotta tiles restoration is successful when the floor becomes stable, cleanable and breathable without losing the physical evidence of its age. Deep stripping removes unstable wax and synthetic build-up. Proper drying prevents moisture from being sealed into the pore structure. A compatible impregnating sealer provides protection without converting fired clay into a plastic-coated surface.
The practical value is binary. If the substrate is sound, the tiles are allowed to dry properly, and the sealing system is matched to their porosity, reclaimed tomettes are a durable and rational flooring choice for a Dordogne property. If the programme depends on rapid washing, forced drying, raw linseed oil or a glossy film applied over old contamination, the floor is not being restored. It is being deferred toward failure.