Antique French Tomettes: Costly Restoration Traps to Avoid
Antique French tomettes are porous terracotta tiles. Their restoration is governed by moisture, residue, and surface absorption—not by the apparent strength of the tile.
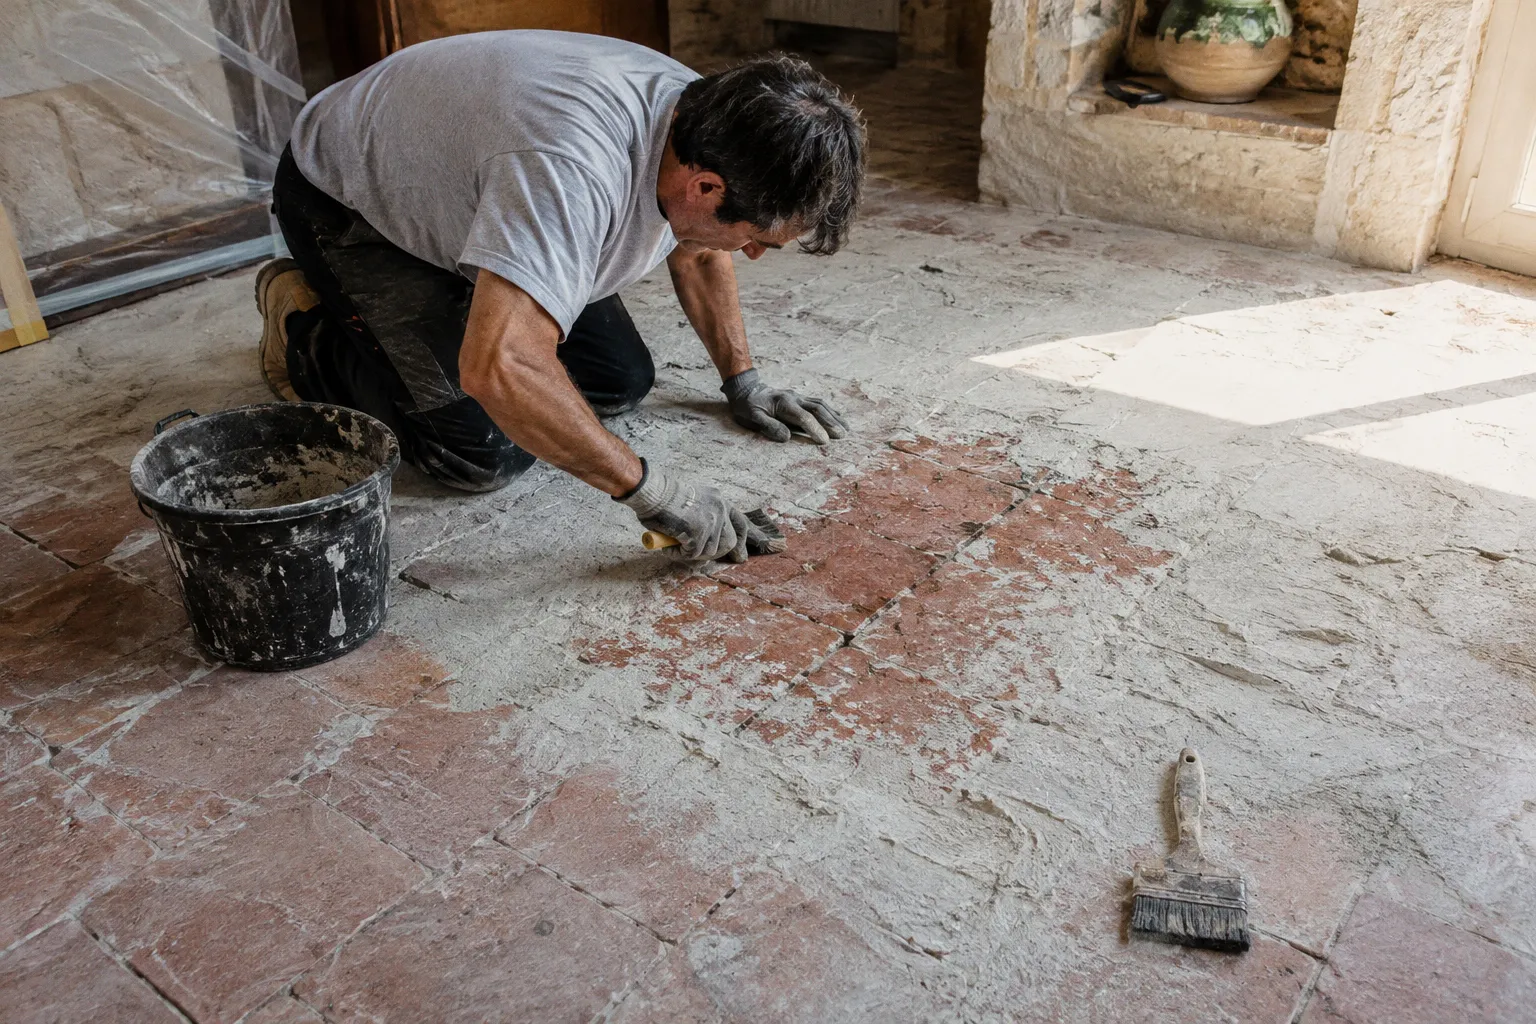
Two figures define the operation: underfloor heating should be switched off for at least 48 hours before cleaning or sealing, and a deeply washed or chemically stripped floor may require 7 to 10 days of drying before any protective finish is applied.
Most antique French tomettes restoration mistakes occur when this sequence is compressed. The floor looks dry at the surface, so wax or sealer is applied. Moisture remains in the clay or the substrate. The result is patchy colour, white salt efflorescence, poor adhesion, or a finish that begins to fail in traffic lanes. The material has not become defective. The process has been mismanaged.
This matters in old farmhouses, barn conversions, and Dordogne properties where original floors may have spent decades exposed to wax, domestic detergents, rising damp, and repeated repairs. A tomette is not a modern ceramic tile with a sealed face. It is a breathable clay component within a floor build-up. Treating it as an inert, mechanically uniform surface is the first error.
Start with the floor structure, not the visible dirt
Before selecting a cleaner or hiring equipment, establish what is actually present.
Antique French tomettes may sit over a masonry slab, lime-based bedding, compacted earth, or a later cementitious repair. The tile surface is only one layer. Water introduced during cleaning can migrate into joints and subfloor materials. If the floor has been laid over a moisture-sensitive or poorly ventilated base, aggressive washing can create a structural problem that was not visible before restoration began.
The inspection should move across the room in physical zones:
- Tile faces: note wax build-up, darkened patches, paint spots, polished traffic paths, and areas with exposed clay.
- Joints: identify open joints, cement repairs, powdering material, and areas where water may pass below the tiles.
- Perimeters: inspect thresholds, skirting lines, fireplaces, external walls, and corners. These are common locations for trapped moisture and salt deposits.
- High-footfall routes: doorways, kitchen approaches, and passages may have lost their old finish through abrasion rather than dirt alone.
- Low-footfall areas: furniture zones often retain thicker wax or sealer residues and may show a different colour once cleaned.
- Heated zones: floors above underfloor heating require a different drying discipline from unheated rooms.
Do not read a dark tomette as automatically dirty. Darkening may come from absorbed oil, old wax, moisture, or natural variation in firing. Mechanical removal can expose a lighter surface, but it can also destroy the original patina that gives the floor its age and tonal range.
The correct objective is usually not uniform newness. It is a stable, clean, breathable surface that remains legible as an old floor.
A tomette floor is not restored when every tile has the same colour. It is restored when the surface is stable, breathable, and compatible with the building beneath it.
A small local test area is more useful than a confident product recommendation. Select a representative tile near an edge or under furniture. Test the proposed cleaning method, observe the residue, and allow the area to dry fully before judging the result. A quick wet appearance is not a reliable indicator of the final tone.
The perils of aggressive mechanical stripping
Industrial sanding equipment is designed for speed and controlled material removal on suitable surfaces. Antique terracotta is neither uniform nor especially tolerant of uncontrolled abrasion.
An industrial floor sander can clog its abrasive rapidly when it encounters old wax or sealer residues. The operator then faces a poor choice: stop repeatedly to change abrasive material, or increase pressure and dwell time. The second approach can damage the tile surface and compromise its structural integrity. The process also generates large volumes of fine terracotta dust, which spread through adjoining rooms, cupboards, ventilation routes, and soft furnishings.
This is one of the most expensive antique French tomettes restoration mistakes because the damage is not limited to the appearance. Excessive abrasion may:
- remove the harder fired surface layer from the tile;
- expose a more absorbent and uneven clay body;
- exaggerate differences between individual tomettes;
- round tile edges or alter already worn profiles;
- create a surface that accepts oil or sealer at inconsistent rates;
- force replacement of tiles that were originally serviceable.
The word “stripping” is also imprecise. Old wax, modern acrylic sealer, paint contamination, grease, and embedded soil do not respond identically. A method that removes wax may have little effect on a synthetic coating. A process that softens a coating may carry dissolved residue into the pores.
Mechanical agitation can have a place, but it should be proportionate to the tile and controlled at a local level. A rotary machine, abrasive pad, or hand tool is not automatically safe because it operates at a lower speed. The contact pressure, dwell time, abrasive grade, and residue being removed still determine the outcome.
For a floor with valuable original tiles, the sensible order is chemical identification by small-area testing, controlled softening or lifting of residues, and restrained mechanical assistance where necessary. The equipment should follow the material. It should not dictate the material’s condition.
What should be recorded before stripping
A basic survey prevents later disputes about whether a change was caused by cleaning or already existed. Record:
1. The approximate tile layout and any areas of replacement.
2. Existing cracks, edge losses, hollow-sounding tiles, and loose pieces.
3. The colour and sheen of representative areas before wetting.
4. The condition of joints and thresholds.
5. Any underfloor heating or recently completed building work.
6. Locations of damp marks, white deposits, and recurring dark patches.
7. The intended finish: untreated, oiled, waxed, or treated with a microporous water-repellent product.
This is not administrative excess. It establishes the baseline. Antique floors are rarely visually consistent enough to be assessed from one photograph or one test tile.
Moisture control defines the restoration
Moisture is the central technical issue in cleaning old terracotta floor tiles in France. The clay is porous. The surrounding joints and bedding may also absorb water. Drying therefore takes place through a three-dimensional floor build-up, not simply from the top face of the tile.
If underfloor heating is present, switch it off at least 48 hours before cleaning or sealing. Heat applied during cleaning can accelerate evaporation at the surface while leaving moisture deeper in the tile or substrate. It can also cause cleaning solutions and sealants to evaporate prematurely, producing uneven spots and inconsistent coverage.
The sequence matters:
- isolate the room and protect adjacent areas from dust and wash water;
- switch off underfloor heating at least 48 hours before treatment;
- remove loose soil and surface debris before introducing liquid;
- use the minimum water necessary for the selected cleaning process;
- extract or remove dirty solution rather than allowing it to migrate into joints;
- ventilate the room without forcing a false surface-dry condition;
- wait for the floor and its surrounding structure to dry thoroughly;
- apply the chosen finish only after the result is stable and the tile is ready to absorb it consistently.
A floor can feel dry underfoot while still holding moisture in the clay. Visual colour is a poor moisture meter. Darker areas may indicate retained water, uneven absorption, old contamination, or a different tile batch. The appearance must be assessed over time, not immediately after washing.
After deep washing or chemical stripping, indoor terracotta floors commonly require 7 to 10 days of thorough drying before wax or sealer is applied. The duration is not a decorative pause. It is part of the treatment. Cold rooms, thick masonry, limited air movement, high humidity, dense joints, and damp subfloors can extend it.
Sealing before complete drying locks moisture into the system. The familiar symptoms are predictable:
- cloudy or patchy finish;
- white salt efflorescence;
- weak or peeling sealer adhesion;
- dark areas that remain visually different;
- gloss variation between adjacent tiles;
- renewed damp staining at edges and joints.
The remedy is not usually another coat. Additional product often increases the thickness of the failed layer and makes later removal more difficult.
The calendar is part of the specification. Seven days of drying is cheaper than one failed sealing operation.
Chemical pitfalls in porous clay
Harsh paint strippers are a poor default for antique terracotta. Products such as Nitromors can penetrate deeply into the pores of the clay. Rubber-based sealers present a similar problem when they are absorbed rather than remaining as a controlled surface film. Once these materials enter porous terracotta, complete removal becomes difficult and may require further abrasion or repeated chemical treatment.
That creates a chain of avoidable damage. The original residue is difficult to identify. A strong stripper is applied. The clay absorbs part of it. The surface becomes contaminated with a new material. Mechanical removal is then used to correct the chemical treatment, removing original tile surface in the process.
The chemistry must be matched to the residue. There is no universal chemical compatibility rule for unknown nineteenth-century waxes, oils, and later coatings. A local spot test remains necessary. Test the effect, the residue, the colour shift, and the drying behaviour. Do not assess only whether the product appears to remove dirt.
A useful test area should be large enough to show variation across more than one tile and at least one joint. One perfectly clean tile can create a false impression. The production floor will contain different firing densities, previous repairs, and contaminant layers.
Avoid treating a product label such as “for stone” or “for tiles” as proof of suitability. Terracotta is not chemically equivalent to glazed ceramic, porcelain, slate, or dense limestone. Its absorption rate changes the behaviour of the product. A cleaner that rinses safely from a dense surface may remain active within porous clay.
Pressure washing indoors should also be rejected as a general method. Water pressure does not solve the underlying problem of residue identification, and uncontrolled water volume can damage the subfloor or drive contamination into joints. Old tomettes require controlled moisture, not simply more force.
Traditional nourishment versus modern synthetic sealers
The final finish determines how the restored floor will age. It also determines whether future maintenance remains practical.
Traditional nourishment of tomettes often uses a mixture of equal parts linseed oil and turpentine. This 50% linseed oil / 50% turpentine ratio is a historical approach, not an automatic prescription for every floor. It changes the colour and absorption behaviour of the clay. It may also produce a stronger visual deepening than a property owner expects, particularly on pale or uneven tiles.
The alternative is a microporous water-repellent sealer designed to allow the clay to breathe. The relevant distinction is not simply traditional versus modern. It is breathable versus film-forming, reversible versus difficult to remove, and compatible versus chemically intrusive.
| Finish approach | Primary behaviour | Main risk | Suitable decision point |
|---|---|---|---|
| Linseed oil and turpentine, equal parts | Nourishes and deepens porous terracotta | Uneven absorption and stronger colour change on variable tiles | Consider only after full drying and representative testing |
| Microporous water-repellent sealer | Offers protection while allowing vapour movement | Product mismatch or over-application can still create patchiness | Evaluate against the tile, joints, and moisture condition |
| Non-breathable synthetic coating | Forms a more continuous surface film | Can trap moisture and become difficult to remove | Generally unsuitable where the floor must continue to breathe |
| Rubber-based sealer | May create a dense protective layer | Deep absorption into porous clay and difficult future removal | Avoid as a default treatment for antique tomettes |
| Wax maintenance layer | Adds surface sheen and can support routine care | Applied over damp or contaminated tiles, it locks in defects | Use only on a dry, compatible, properly prepared surface |
Patina is not the same as dirt, and protection is not the same as gloss. A high-shine finish may photograph well while revealing every application mark in normal daylight. It also changes footfall behaviour. Areas that receive repeated traffic can become polished before surrounding zones, producing lanes that are more obvious than the original wear.
For a gîte or restored farmhouse, maintenance deserves the same attention as the first treatment. Kitchen grease, tracked grit, chair movement, and wet footwear will load the highest-use areas first. A finish that cannot be locally maintained without creating visible halos is a poor operational choice, regardless of its initial appearance.
The treatment should therefore be judged against the building’s use. A quiet private room has different footfall metrics from an entrance hall connected directly to a garden. The finish in a rental property must tolerate repeated cleaning and variable guest behaviour. It should not depend on perfect housekeeping or a narrow humidity range.
The essential timeline for a professional result
The restoration timeline is slower than most marketing descriptions suggest because each stage has a different purpose.
Stage one: survey and containment
Map the floor. Identify loose tiles, damp zones, previous repairs, and heated areas. Remove movable furniture. Protect doorways and adjacent finishes. Establish where dust and wash water can travel.
Stage two: dry removal
Vacuum and remove loose debris before wet treatment. Scraping should be controlled and local. The goal is to reduce the contaminant load without cutting into the clay.
Stage three: spot testing
Test the proposed cleaner or residue-softening method in a representative area. Include variations in tile colour and at least one joint. Allow the test to dry before deciding that the method is acceptable.
Stage four: controlled cleaning
Work in manageable sections. Avoid flooding the floor. Remove contaminated solution promptly. Do not increase chemical strength simply because an old wax layer is slow to respond. Slow response may indicate a coating that requires a different approach.
Stage five: drying
Allow 7 to 10 days after deep washing or stripping as a working minimum for indoor floors, subject to the building’s actual condition. Underfloor heating must remain off during the preparation period and should not be used to force premature evaporation.
Stage six: finish testing
Apply the proposed oil, sealer, or wax to the dry test area. Observe colour, absorption, sheen, and edge marking. Check the result after normal room conditions return. A finish that looks acceptable when freshly applied may become visibly uneven as it cures.
Stage seven: staged application
Apply the selected finish in controlled sections, keeping coverage consistent. Avoid creating wet edges that remain visible. Do not add a second layer simply to compensate for an uneven first layer. Determine whether the problem is absorption, moisture, residue, or application technique.
Stage eight: controlled return to use
Keep heavy footfall off the floor until the treatment has stabilised according to the product or system being used. Reintroducing furniture, rugs, and traffic too early can mark a soft finish and conceal defects until correction becomes harder.
This sequence is less dramatic than sanding a room in a day. It is also more compatible with the physical reality of antique clay.
When replacement is the wrong conclusion
A damaged tile is not automatically a failed floor. Antique tomettes often contain variations that modern replacement tiles will not reproduce: different firing tones, worn edges, minor dimensional differences, and changes caused by years of footfall. Replacing a large area to achieve visual uniformity can remove the very evidence that establishes the floor’s age.
Equally, preservation does not mean retaining every unsafe or structurally failed component. Tiles that are fractured, loose, or unsupported may require careful lifting and local repair. The distinction is between necessary intervention and cosmetic standardisation.
The same judgement applies when laying reclaimed tomette floors in the Dordogne. Reclaimed material should be assessed as a batch, not selected from one attractive sample. Thickness variation, backs contaminated with old bedding, chipped edges, and differing absorption rates affect installation and later finishing. A reclaimed floor may need sorting before laying, and the finished surface will not behave like a factory-calibrated product.
For original French farmhouse tiles, the best result usually comes from accepting controlled variation. The room should read as a coherent floor, not as a newly manufactured grid.
The auditor’s verdict
The costly errors are consistent: industrial sanding used as a universal solution, aggressive paint stripper applied without testing, pressure washing treated as cleaning, underfloor heating left active, and sealer applied before the clay is completely dry.
The correct approach is slower and more exact. Survey the floor, identify the residue, control the water, protect the breathable structure, and allow the drying period to run its course. Use the 50% linseed oil / 50% turpentine traditional mixture or a microporous water-repellent sealer only after a representative test has established that the material and the finish are compatible.
The binary verdict is straightforward. If the objective is a glossy, uniform surface delivered immediately, antique tomettes are the wrong material. If the objective is a stable original floor with retained variation, breathable protection, and a finish that can survive the building’s actual footfall, restoration is justified—but only when the process is treated as conservation rather than cosmetic cleaning.