Reclaimed terracotta floors: hidden installation traps
Reclaimed terracotta floor tiles rarely arrive as a perfectly obedient batch. Their surfaces may carry old mortar, their edges may be softened by years of use, and their dimensions can vary from one tile to the next.
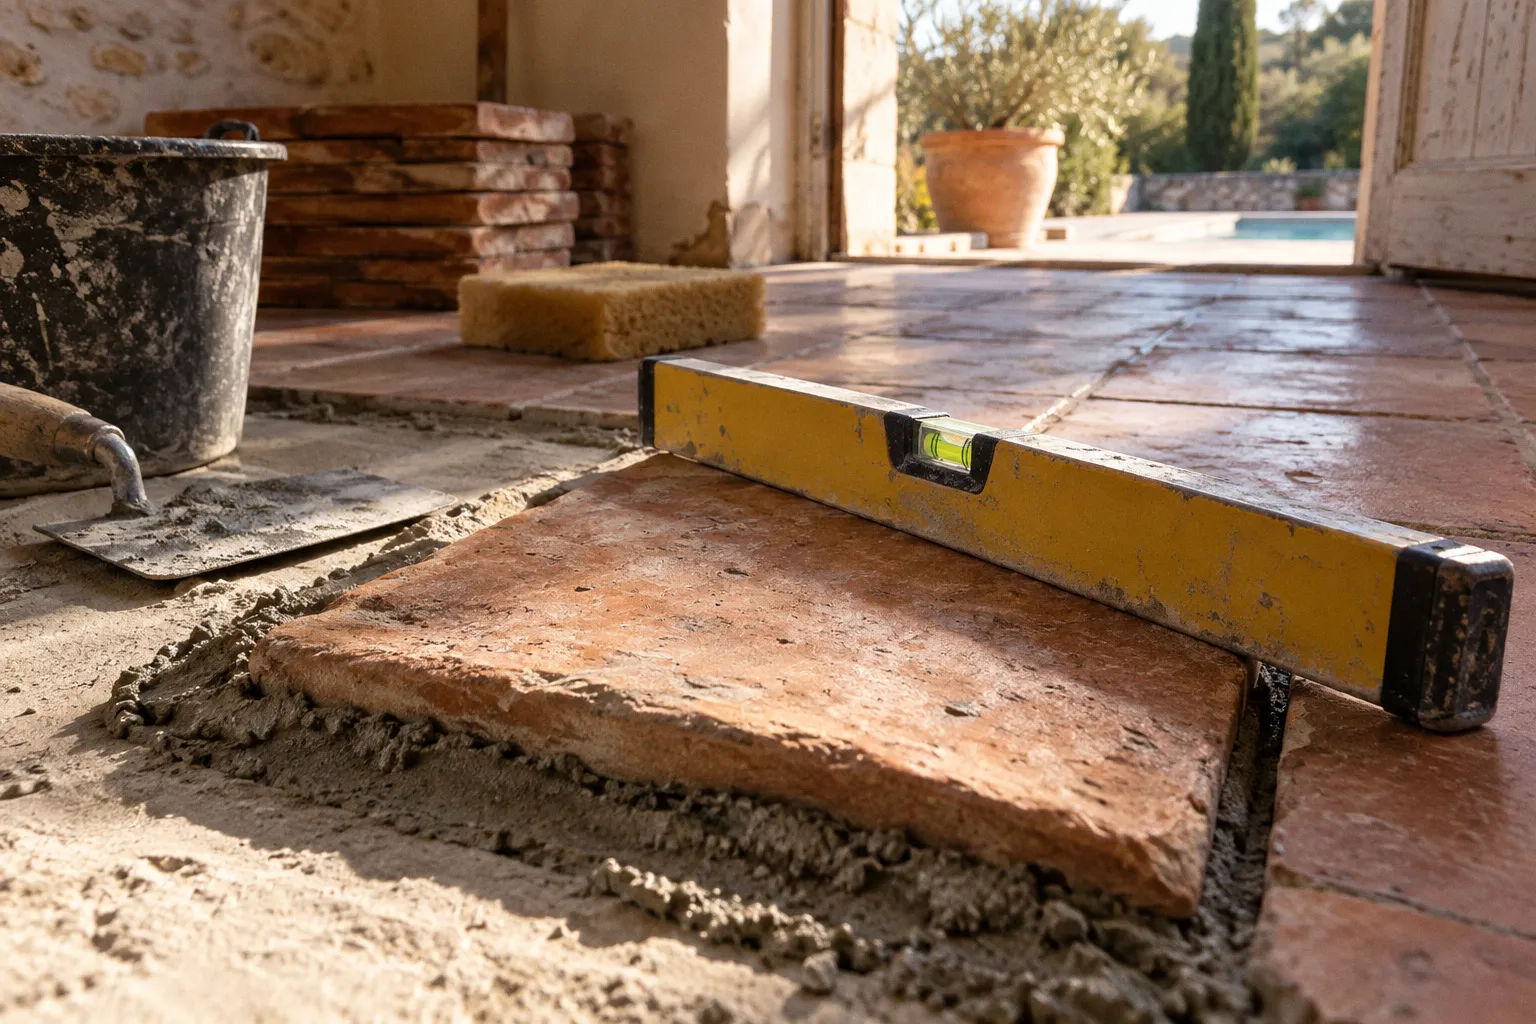
That irregularity is part of their appeal, but it also explains why reclaimed terracotta floor tiles installation pitfalls tend to appear only after the work has begun: a floor that looked simple on paper becomes a sequence of decisions about moisture, height, joint width, sealing and bedding.
The most expensive mistakes are usually made before the first tile is fixed. Grouting too soon, laying onto a damp screed, ignoring the finished floor height or choosing a film-forming sealer for an exterior terrace can leave you with staining, hollow areas, peeling finishes or doors that no longer open cleanly. Installing salvaged French terracotta successfully is less about forcing old material into a modern system and more about giving the material the conditions it has always needed.
The porosity challenge: why pre-sealing is non-negotiable
Natural terracotta is highly porous. In practical terms, it behaves rather like a sponge: grout water and pigment can travel into the body of the tile instead of remaining neatly at the joint. Once that happens, the mark may not sit on the surface waiting to be scrubbed away. It can become part of the tile’s colour.
This is the first major distinction between reclaimed terracotta and porcelain tiles made to imitate it. A porcelain terracotta-look tile may have very low porosity—around 0.5% in some products—whereas genuine antique clay tiles absorb readily. The old tile has been fired, handled and weathered as a piece of material, not manufactured to a tight modern tolerance.
Before grouting, the tiles need an appropriate initial seal. The purpose is not to make them glossy or to create a plastic skin. It is to reduce the speed and depth at which the grout can enter the clay, giving you a workable surface while preserving the visual variation that makes reclaimed flooring worthwhile.
Why the order of work matters
A common restoration mistake is to treat sealing as the final decorative stage. With porous terracotta, some sealing must happen before the joints are filled. The final protective treatment comes later, once the installation has cured and the surface has been cleaned properly, but the first coat has a very different job.
The sequence usually needs to account for:
1. Cleaning the tile faces and edges. Old mortar, dust and loose material should be removed without polishing away the aged surface.
2. Allowing the tiles to dry fully. A sealer applied over trapped moisture may behave unpredictably, particularly where the tile has a dense layer of old residue on its underside or edges.
3. Applying the pre-grout sealer evenly. The face and, where appropriate, exposed edges need enough protection to resist grout staining without leaving a heavy film.
4. Grouting only after the sealer has reached its usable state. The product’s drying and curing instructions matter here; rushing because the floor looks dry is not the same as allowing the treatment to settle.
5. Removing grout residue promptly and carefully. A pre-seal reduces absorption, but it does not make terracotta stain-proof.
The exact product choice should suit the tile, the location and the intended finish. Reclaimed tiles vary widely in density, so one sample should be tested before the whole batch is treated. A small trial area can reveal whether the colour deepens, whether the surface becomes too shiny and whether the grout can be removed cleanly from the face.
Pre-sealing is not a cosmetic extra. On porous reclaimed terracotta, it is part of the grouting system.
The temptation to make every tile look the same
Antique floor tile restoration mistakes often begin with an attempt to erase the evidence of age. A darkened edge, a filled pore or a faint tonal difference can be treated as a defect when it is actually part of the floor’s material history. That does not mean accepting every mark without judgement. Oil, cement residue and loose old mortar should be removed where they interfere with adhesion or maintenance. But colour variation, softened corners and small changes in texture need to be assessed as part of the finished composition.
If a tile is heavily contaminated, it may require more cleaning than its neighbours. It is wise to complete that work before laying, rather than trying to rescue isolated tiles after they have been surrounded by fresh grout. A floor made from reclaimed material should look coherent, not mechanically uniform.
Subfloor precision: moisture and level are not optional details
Traditional-looking material still needs a technically sound base. Reclaimed terracotta can tolerate visual irregularity, but it cannot compensate for a subfloor that is damp, unstable or outside reasonable flatness tolerances.
Residual moisture is one of the quiet causes of failure. The permitted level depends on the screed type:
| Subfloor condition | Residual moisture limit |
|---|---|
| Calcium sulfate screed | No more than 0.5% CM |
| Cement screed | No more than 2% CM |
These are not figures to estimate by touch or by judging whether the surface appears pale and dry. Moisture testing needs to be carried out with the appropriate method before the installation proceeds. A reclaimed tile may have survived decades in an old building, but that does not mean it can be fixed safely onto a newly laid screed that has not completed its drying process.
Trapped moisture can affect adhesion, curing and the performance of the seal. It may also contribute to staining or a patchy appearance as moisture moves through the porous clay. In a farmhouse renovation, where old walls, changing ground levels and new concrete or screed often meet, the moisture route needs to be understood rather than assumed.
Flat enough for the bedding method
The visual character of a reclaimed floor comes from variation in the tiles, not from unexpected dips in the substrate. According to the DIN 18202 standard cited for subfloor tolerances, deviations should not exceed 3 mm over a 2-metre measuring length.
That does not mean the finished floor must look clinical. It means the supporting surface needs enough consistency for the chosen installation method. If the base is uneven beyond that range, the bedding or adhesive thickness can become inconsistent. Some tiles may be properly supported while others bridge a hollow. Over time, those unsupported areas are vulnerable to movement or cracking.
Before laying, a practical inspection should include:
- checking the floor with a 2-metre straightedge rather than relying on a short spirit level;
- identifying hollows, ridges and transitions between old and new construction;
- confirming the screed type and residual moisture;
- checking where the finished level will meet stairs, thresholds, skirting and adjoining rooms;
- deciding whether the base needs levelling before the reclaimed tiles are introduced.
The preparation stage can feel slow because there is nothing decorative to show for it. Yet it is where much of the floor’s long-term performance is decided.
The hidden impact of height: thresholds, stairs and doors
Thick antique terracotta tiles can raise the floor level substantially, especially when they are installed over an existing tiled surface or placed on a traditional mortar bed. The increase is not limited to the tile itself. You also need to account for the bedding layer, adhesive or mortar, any levelling compound and the final surface treatment.
This is where a beautiful floor can create very ordinary household problems. A door may catch on the new surface. A threshold may become an awkward trip point. A stair’s first or last riser may no longer match the others. The effect can be subtle enough to overlook during planning but obvious every time someone carries a basket, a tray or a suitcase across the room.
Measure the finished build-up, not only the tile
When comparing reclaimed batches, record more than length and width. Thickness variation is part of the material, and an antique tile that looks modest in the hand can require a substantial bed beneath it.
The finished height should be considered at:
- door openings and door swings;
- staircases, particularly the first and final riser;
- fireplaces and hearth edges;
- kitchen units and built-in cupboards;
- bathroom thresholds;
- connections to existing stone, timber or modern tile;
- exterior doors where rainwater must still drain away from the building.
If reclaimed tiles are being laid directly over existing tiled flooring, the height increase deserves special attention. Removing the old floor may be more disruptive, but keeping it can shift every adjoining level. There is no universal answer: the right decision depends on the structure, the condition of the existing surface and the available height at doors and stairs.
A useful sample panel should include the actual tile, the proposed bedding system and the intended finish. Set it beside a door threshold or transition where possible. Looking at a loose tile on a table will not show you how the finished floor changes the room.
The floor height is not a technical footnote. It changes how the room opens, how the stairs feel and where water can travel.
Mortar mastery: traditional lime bedding versus modern adhesives
The laying method should follow the tile and the building rather than a general preference for old or new techniques. Modern adhesives can be appropriate in a prepared interior installation, particularly where the substrate is stable and level. A traditional thick-bed method may be more suitable where the tiles are substantially variable or where the character of the building calls for a lime-and-sand bedding system.
For thick-bed mortar laying, manufacturers recommend soaking the terracotta tiles in water for about one hour, then placing them onto a 4–5 cm bed made from lime and river sand. The soaking stage matters because a dry porous tile can draw moisture from the mortar too quickly. That can interfere with the bedding process and make it harder to achieve consistent contact beneath the tile.
Soaking does not mean leaving the tiles indefinitely in water or laying them while water is visibly running from the surface. The practical aim is to moderate the tile’s absorption. The condition of the tile when it reaches the bed should be managed carefully, just as you would manage the moisture of a seedbed before planting: too dry and it takes from the material around it; too wet and the installation becomes difficult to control.
Joint width and the visual rhythm of an old floor
Hand-aged and antique tiles are not always designed for narrow, machine-perfect joints. Their edges may be irregular, and small differences in dimension need to be absorbed somewhere. A joint gap of up to 5 mm is commonly recommended for hand-aged or antique tiles, depending on the variation within the batch.
The correct width is therefore a visual and technical decision. If the joint is too narrow, the installer may be forced to compensate by misaligning tiles or creating pressure at the edges. If it is too wide, the floor can look more segmented than intended and require a greater volume of grout.
Laying should begin with a dry arrangement that shows how the variation will be distributed. Avoid placing every unusually narrow or unusually wide tile in one area. A well-composed floor spreads the irregularities so that the eye reads them as a natural pattern rather than a patch of poor control.
The same principle applies to colour. Reclaimed terracotta may include warm reds, pale salmon, smoky browns and more muted fired tones. Mixing from several boxes or pallets helps avoid visible blocks of one shade. This is not about manufacturing randomness; it is about preventing the floor from looking accidentally striped.
Removing old mortar from the underside
Salvaged French terracotta may arrive with historical mortar attached. Removing it can be labour-intensive, and the material may vary from one tile to the next. The underside needs to be sufficiently clean for the selected bedding method, but aggressive cleaning can damage fragile edges or reduce the tile’s usable thickness.
The right balance is practical:
- remove loose material that prevents stable contact;
- avoid chasing a perfectly smooth underside if doing so risks breaking the tile;
- separate badly damaged pieces before the main laying day;
- retain sound irregularity where it can be accommodated by the bedding;
- allow extra time for sorting, because reclaimed stock rarely behaves like a boxed modern product.
The exact labour cost of removing historical mortar depends on the batch and the region, so it should be treated as a separate preparation allowance rather than hidden inside a generic laying rate.
Outdoor installation risks: why topical sealers fail
Exterior terracotta is exposed to a much harsher cycle than an indoor kitchen or hallway. Rain, frost, direct sun, ground moisture and repeated wetting can all test the clay and the protective treatment. The temptation is to use a water-based or film-forming topical sealer because it appears to offer a strong surface barrier. On outdoor terracotta, that choice can create a larger problem.
Non-breathable water-based or topical sealers can fail outdoors, leading to peeling and whitening. Once the finish breaks down, removing it may require full chemical stripping back to the raw tile. That is a major intervention on a porous, uneven material, and it can change the appearance of the reclaimed surface in the process.
The central issue is not simply whether a sealer is labelled for terracotta. It is whether the treatment is compatible with:
- exterior exposure;
- the tile’s porosity;
- moisture movement through the substrate;
- freeze-thaw conditions where relevant;
- the intended appearance, from matte and dry-looking to enhanced and deeper in colour;
- future maintenance and the possibility of re-treatment.
A product that performs well on an interior floor may not be appropriate on a terrace or external walkway. Exterior installation should be treated as a separate specification, not as an indoor floor with a stronger coat applied on top.
Water needs somewhere to go
Sealing does not replace drainage. An exterior reclaimed terracotta floor still needs a sound base and a layout that does not direct standing water towards the building. Particular care is needed around thresholds, wall junctions and changes in level.
If the tile and subfloor remain damp for long periods, even a breathable treatment may not solve the underlying issue. The installation needs to be designed so that water is managed through falls, joints and the surrounding construction rather than trapped beneath an impermeable layer.
A workable sequence for a reclaimed terracotta project
The safest installation plan is not the one that gets tiles down fastest. It is the one that allows each decision to be checked before it affects the next stage.
A sensible sequence looks like this:
1. Sort and inspect the batch. Record thickness, visible damage, old mortar and colour range before committing to a layout.
2. Make a dry arrangement. Use the actual tiles to assess pattern, joint width and transitions.
3. Confirm the finished floor height. Include the tile, bedding, adhesive or mortar, levelling layers and final treatment.
4. Test the substrate. Check moisture according to the screed type and measure flatness over a 2-metre length.
5. Choose the laying system. Decide between an appropriate adhesive installation and a thick lime-and-sand bed based on the tile, base and building.
6. Prepare a sample area. Include cleaning, pre-sealing, bedding, jointing and the proposed final finish.
7. Pre-seal before grouting. Do not rely on the final protective treatment to prevent grout staining.
8. Lay with the planned variation. Mix tiles across the batch and keep the joint rhythm intentional.
9. Allow curing and drying time. Avoid sealing or loading the floor simply because the surface feels firm.
10. Finish according to location. Interior and exterior terracotta require different decisions about breathability, protection and maintenance.
This sequence also gives you a point at which to stop. If the sample panel shows dark grout edges, uneven absorption, an unsuitable sheen or a threshold problem, the method can be changed while the cost is still contained.
Maintaining the floor after installation
French farmhouse flooring maintenance is gentler when the installation has been specified correctly. Terracotta generally benefits from regular dry removal of grit and careful cleaning rather than aggressive products used in an attempt to restore a neglected surface all at once. Grit acts as an abrasive, particularly around entrances and beneath dining chairs, so a routine that removes it early will protect the finish.
The maintenance plan should match the sealer and the room’s use. A busy kitchen, an occasional sitting room and an exterior terrace will not have the same cleaning rhythm or re-treatment needs. Storage temperature also matters when keeping spare treatment products: avoid storing them in conditions that compromise the product before it reaches the floor.
Keep a few spare tiles from the original batch if possible. Reclaimed material can be difficult to match later, and a replacement from another source may differ in thickness, colour and absorption. Label the spare pieces with their location and any notes about the installation system. That small bit of housekeeping can save considerable trouble after a broken tile, plumbing repair or threshold alteration.
The main lesson behind the common errors in historic floor restoration is straightforward: reclaimed terracotta does not need to be made modern, but it does need to be installed with modern discipline. Its pores, variations and softened edges are not faults to be concealed; they are conditions to be planned around. Test the moisture, measure the level, allow for the full height, pre-seal before grouting and treat exterior protection as its own technical question.
If you are planning the work, make one proper sample panel before ordering the final labour or committing the whole room. It will show you more than a photograph ever can: the real colour after sealing, the behaviour of the grout, the joint rhythm, the threshold height and whether the floor still feels like itself once the practical layers have been added.